
This week, I thought I'd try something a little different with the sponged designs. Since I didn't have time to edit video last week, I figured I'd just do another static tutorial this week. It was fun, though it did take quite awhile for this particular manicure...

To start, I layered two coats of "MDTK" over a coat of Seche Vite base coat:

I couldn't get my BB open, so two coats of "Well-Cultured Pearl" at the tips, and then one more thin coat of MDTK over the whole nail, to mute the white and blend.

Then I used Here "Today, Aragon Tomorrow" applied with a fine paintbrush to create stems and leaves for my flowers:
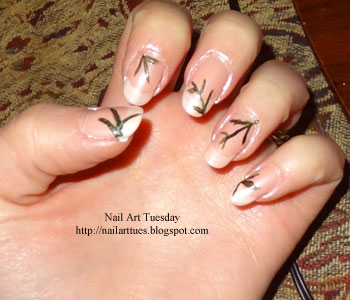
And then a small piece of natural sponge dipped into "Wine Me, Dine Me" to apply the flowers.

Two coats of Seche Vite top coat to seal, a little clean-up, and voila! Puffy flowers!

Nonetheless, I've gotten several compliments on this one this week, so it's definitely getting noticed. :-)
I just got a package of goodies from Glamorous Cosmetics, so next week, a manicure featuring those! Until then, happy polishing...


0 comments:
Post a Comment